

http://www.bakersfieldmom.com
Materials:
- Wooden dowels (allow about a foot in length per wand) - got these from Spotlight
- Thick Satin Ribbon (I used
ribbon that was 5cm thick for most of the wands, 4cm for the wands I did
for the 1 year olds like Ana. I bought lengths that were 3m long for
the bigger cousins which was a nice length, and I think Ana's is only 2m
long - easier for the little ones to play with without knotting it up)
- Eye-hooks (these are
something used for blinds or curtains or something?! It took the
ladies at spotlight a little minute to figure out what I was after, thank
godness I knew what they looked like!...) You bought them seperately for a few cents each :)

- Fishing swivels (yeah..
weird. AND my first real sojourn into Anaconda. But
they're the secret to making the ribbon wands get the movement they really
need!! So there I was in the fishing section, choosing the most
flexible and aesthetically pleasing kind of 'barrel swivel' I
could find :)) Here are the ones I settled on...

- Optional: paint/wood stain
- Needle and thread the colour
of your ribbon-ish (Okay, if it's going to annoy you, you'd better find a
thread the EXACT same colour of your ribbon... I always kind of like that
my thread's a tiny bit darker or lighter than the fabric I'm using... and
still wondering why I do not celebrate a great deal of sewing success!!
:))
How to
make them:
1. Cut the dowel to
size. I (haha - okay, James) cut most of the pieces about a foot long,
but did a couple of smaller pieces for the babies. For example the one we
made for Ana was only 9 inches, or about 23cm long.
2. Paint/stain the
dowel. We just stained ours (okay, James did this bit for me too :))
using leftover wood stain from some shelves a couple of years ago. Here's the before/after wood:

3. I'm sure I could have
managed steps 1 and 2 myself, but James was happy to participate in making the
gifts, which was nice... plus he took the wood to work and cut it on some big
machine and it took 2 seconds...
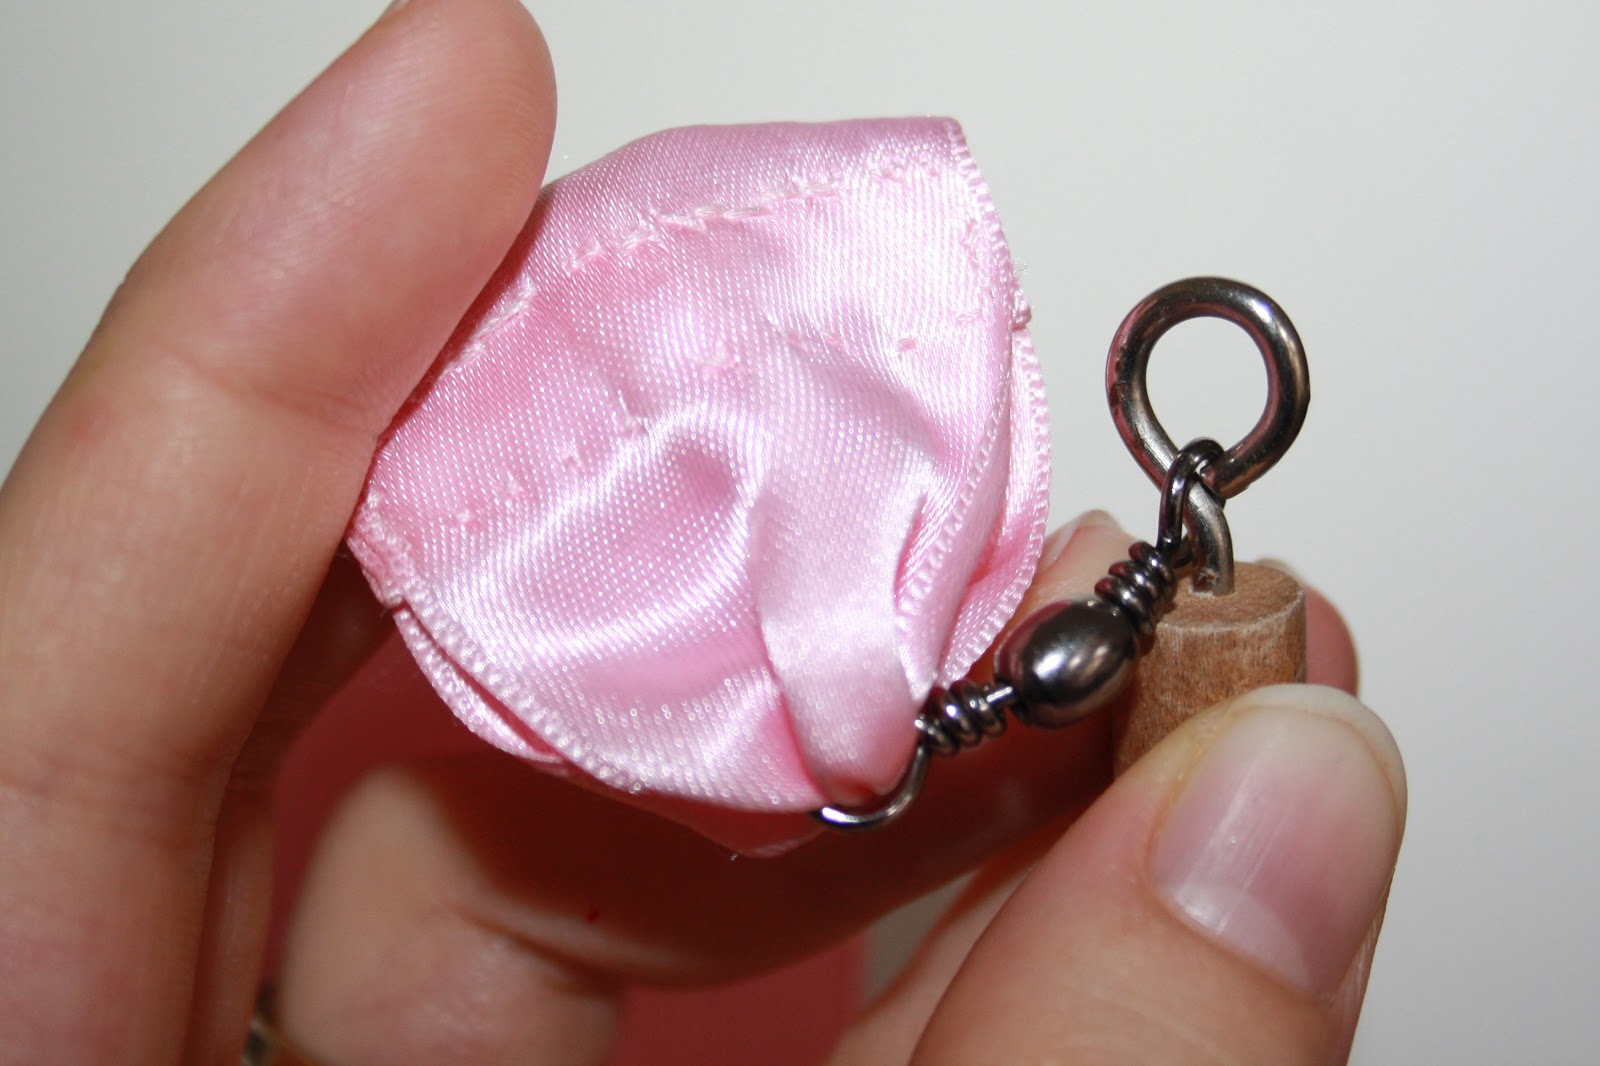
4. Screw in the
eye-hooks, into the centre of one end of the piece of dowel - I ended up
needing to use pliers or something to turn the eye-hook near the end, to make
sure it was in nice and tight!

5. Slip one end of the
swivel onto the eye-hook, and close the eye hook up again nice and tight again
with pliers or something (okay, I admit, James did this too...but again, it's
all doable - I was just keen to get him on board Christmas-ing! :))

6. Get out your ribbon!!
This is the bit that I really enjoyed, partially I guess because I
actually DID this bit, but also because it's kind of nice
and therapeutic to do a little hand sewing every now and then! Especially
if it really is just a little.. :) I threaded the ribbon through the loose end of the swivel, and then I
folded the end over a couple of times, then sewed it together. I folded it over a few times so it wouldn't fray.. and then I sewed it all around the folds, as you can see in the pics. My sewing is nothing special at all (except for therapeutic for me!), and looks kind of awful I guess, but you can't tell unless you're taking close up photos to put on your blog (sigh) :) I'm sure you could do this and maybe make it look a little more professional!! :)
7. Grab a match/candle/lighter/whatever brand of fire you like, and burn the end a little to seal it and so it doesn't fray! :)

And you're done!! :) Simple, cute and a lot of fun!!! Hopefully whoever you're sewing it for, loves it as much as my little one does! :)


Wow, that's actually more complex than I would have given it credit for. I'm way more impressed with your/James' skills now :)
ReplyDeleteThe kiddies do seem to love them! Great ideas Abs :)
The girls love these! :)
ReplyDeletexoxo